Project Info - OMEGUN
OMEGUN is a heavily altered version of the FPS template found here. The project includes two levels that have been made with newly added weapons and enemies. Combat has been completely overhauled into a doom-like run and gun shooter. Here you will see how my encounter design constantly puts players in unique and interesting situations.
Main Takeaways
- Encounters should be made with a purpose: Encounters, as well as levels as a whole, should be "about something" whether its teaching the player how to use a weapon or showing off an enemy in a unique context.
- Asymmetrical arenas, though harder to make, are much more interesting to traverse.
- An arena's size and shape, and how it plays into the player's arsenal and enemy behavior, is important to consider.
Paper Design
Tip: You can click on images to enlarge them.
Weapon Design
My initial goal was to create a simple emulation of run and gun shooters the likes of Serious Sam or DOOM. As I tested different iterations of the template's weapons, however, I ended up designing a new mechanic that would become central to OMEGUN's gameplay. The template allowed each weapon to be aimed down their sights, gaining accuracy at the cost of movement speed. I originally planned to axe this feature, but realized in testing that there was a certain fun in strategically doing the one thing you shouldn't do in a movement shooter: That is, stop moving.
This concept birthed OMEGUN's central weapon design: All weapons could be aimed to activate a powerful secondary fire at a considerable cost to movement speed. Enemies hit hard in OMEGUN, so if the player chooses to use their secondary fire at an inopportune moment, they are liable to take a ton of damage. This idea would not only inform the design of weapons, but enemies and combat as a whole.
There is a technique that allows you to move faster while aiming down sights. If the player takes a short running start and then jumps, aiming in mid air, they will not slow down from aiming until they touch the ground. Should the player jump the moment they touch the ground, either in the same direction they were moving or without a movement input, some of their momentum will be preserved. Chaining these jumps together (or Bunny Hopping, as it is often called in shooters) lets the player move quickly while aiming until their momentum runs out. Though this allows the player to reposition and dodge to an extent while using a weapon's secondary fire. However, swapping directions sharply will quickly kill the player's momentum, so this mobility comes at the cost of control.
While I do not consider this technique necessary to playing or enjoying OMEGUN, I believe having interesting and useful options to try helps to keep a game fresh should a player replay it. Admittingly, there's also just something strangely satisfying about constantly jumping as you move. The air mobility and ground friction have been tuned somewhat to make this technique feel good to perform.
Spitfire: The Pistol
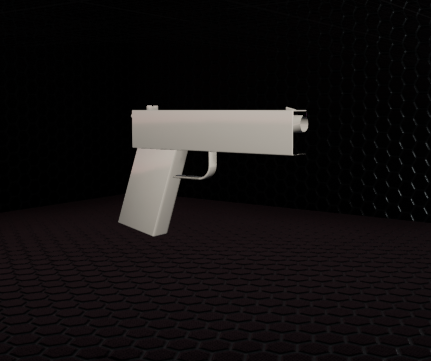
Spitfire is OMEGUNS's starting and backup weapon. It is useful in most situations but only deals reasonable damage, though headshots are especially rewarding and kill weaker enemies with a single burst. Its primary fire is a five round burst with modest spread. Its secondary fire is Hyper-Auto, which causes the weapon to fire full auto while completely eliminating its spread. The weapon has infinite ammo and never needs to reload.
Rather than leaning fully into Spitfire being weaker as a backup weapon and risk it becoming unfun to use, I've instead made getting the maximum damage from this weapon more tricky and dangerous than others. In this way, I hope to make the weapon's drawbacks fun for the player to engage with. The lengthy burst and fair delay between bursts (~ .5 seconds) emphasizes the need for accuracy where missing a shot with the other two weapons is less punishing. Alternatively, accurate fire is less necessary with the increased fire rate and damage output of the weapon's secondary fire, though in turn the slow down from aiming puts the player in danger. The ultimate goal is that the Spitfire remains an effective and interesting part of the player's arsenal while still highlighting the strength of the weapons the player acquires later on.
Shellcannon: The Shotgun
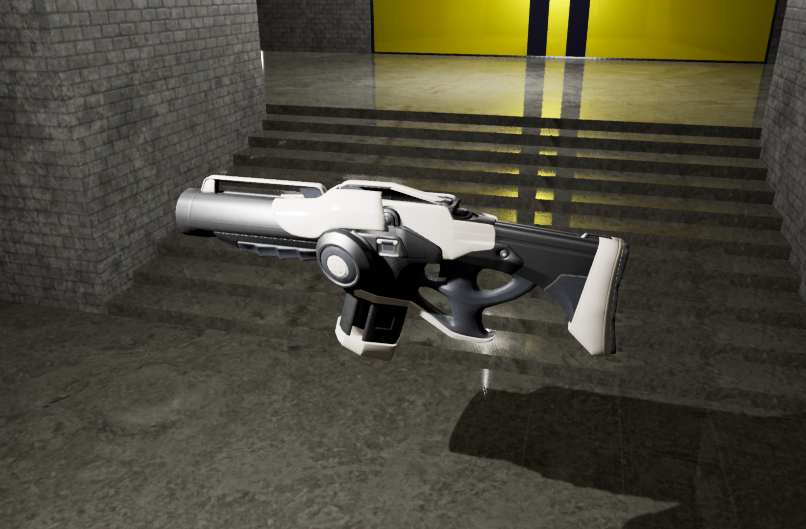
This game's shotgun takes the form of the Shellcannon. It is a semi-auto shotgun that fires 3 shots before needing a brief moment to reload. Its secondary fire performs an "Explosive Mag Dump", firing the remainder of its magazine as a precise burst of rockets. This is an intermediate weapon used to deal with the more numerous and more dangerous enemies in Map 2.
The weapon's primary firing mode can easily one-shot many enemies when close enough and can be fired rapidly to burst down heavier enemies. There is no damage dropoff in OMEGUN, so the weapon has a higher effective range against larger targets, reducing the need to get close to the more dangerous enemies.
Within the OMEGUN's grander design scheme, the Shellcannon's secondary fire serves an interesting role. The burst of rockets does not end if the player stops aiming, so the slowdown from using it is only brief, or none at all if the player uses it midair. While this eliminates the flaw typical to OMEGUN's secondary firing modes, this is only traded in for a different downside: The secondary fire will always shoot out the Shellcannon's remaining magazine, so it is very easy to waste ammo against weaker enemies who can only take a single rocket. A simple way to alleviate this issue is to not reload the weapon and use its secondary when only one or two shells remain. A more advanced trick is to sweep the weapon as it fires its rockets, letting you blast multiple areas with a single burst of rockets. The burst speed of the Shellcannon's rockets is tuned specifically with this use in mind. Despite its quirks, the Shellcannon's secondary fire lets it obliterate groups of enemies or tear apart tougher enemies from afar.
The OMEGUN
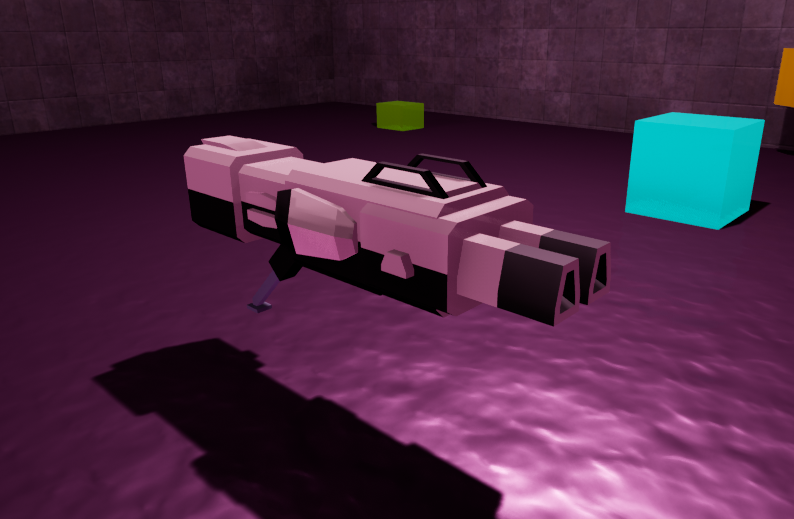
The OMEGUN is a top-of-the-line rapid fire super weapon. Even a short burst kills weaker enemies and sustained fire shreds anything stronger. The weapon's sheer power can be felt with the insane speed at which it fires its laser blasts. The OMEGUN's only weakness is the scarcity of its ammo. It never needs to reload, and its secondary fire eliminates the need to even aim, causing its projectiles to home in on the closest enemy in front of you. This weapon is made to capture that special satisfaction gained from holding the trigger down and watching everything in front of you melt, with the secondary fire made in service of this.
Other than being absolutely sick, the secondary fire lets the OMEGUN snipe far away enemies or shred tightly knit groups without wasting the weapon's precious ammo. However, headshots are next to impossible with this firing mode. While the OMEGUN is balanced in favor of body shots, dealing only marginally increased damage with headshots, it is still enough for a player to perhaps prefer the primary fire at medium to close ranges based on their accuracy.
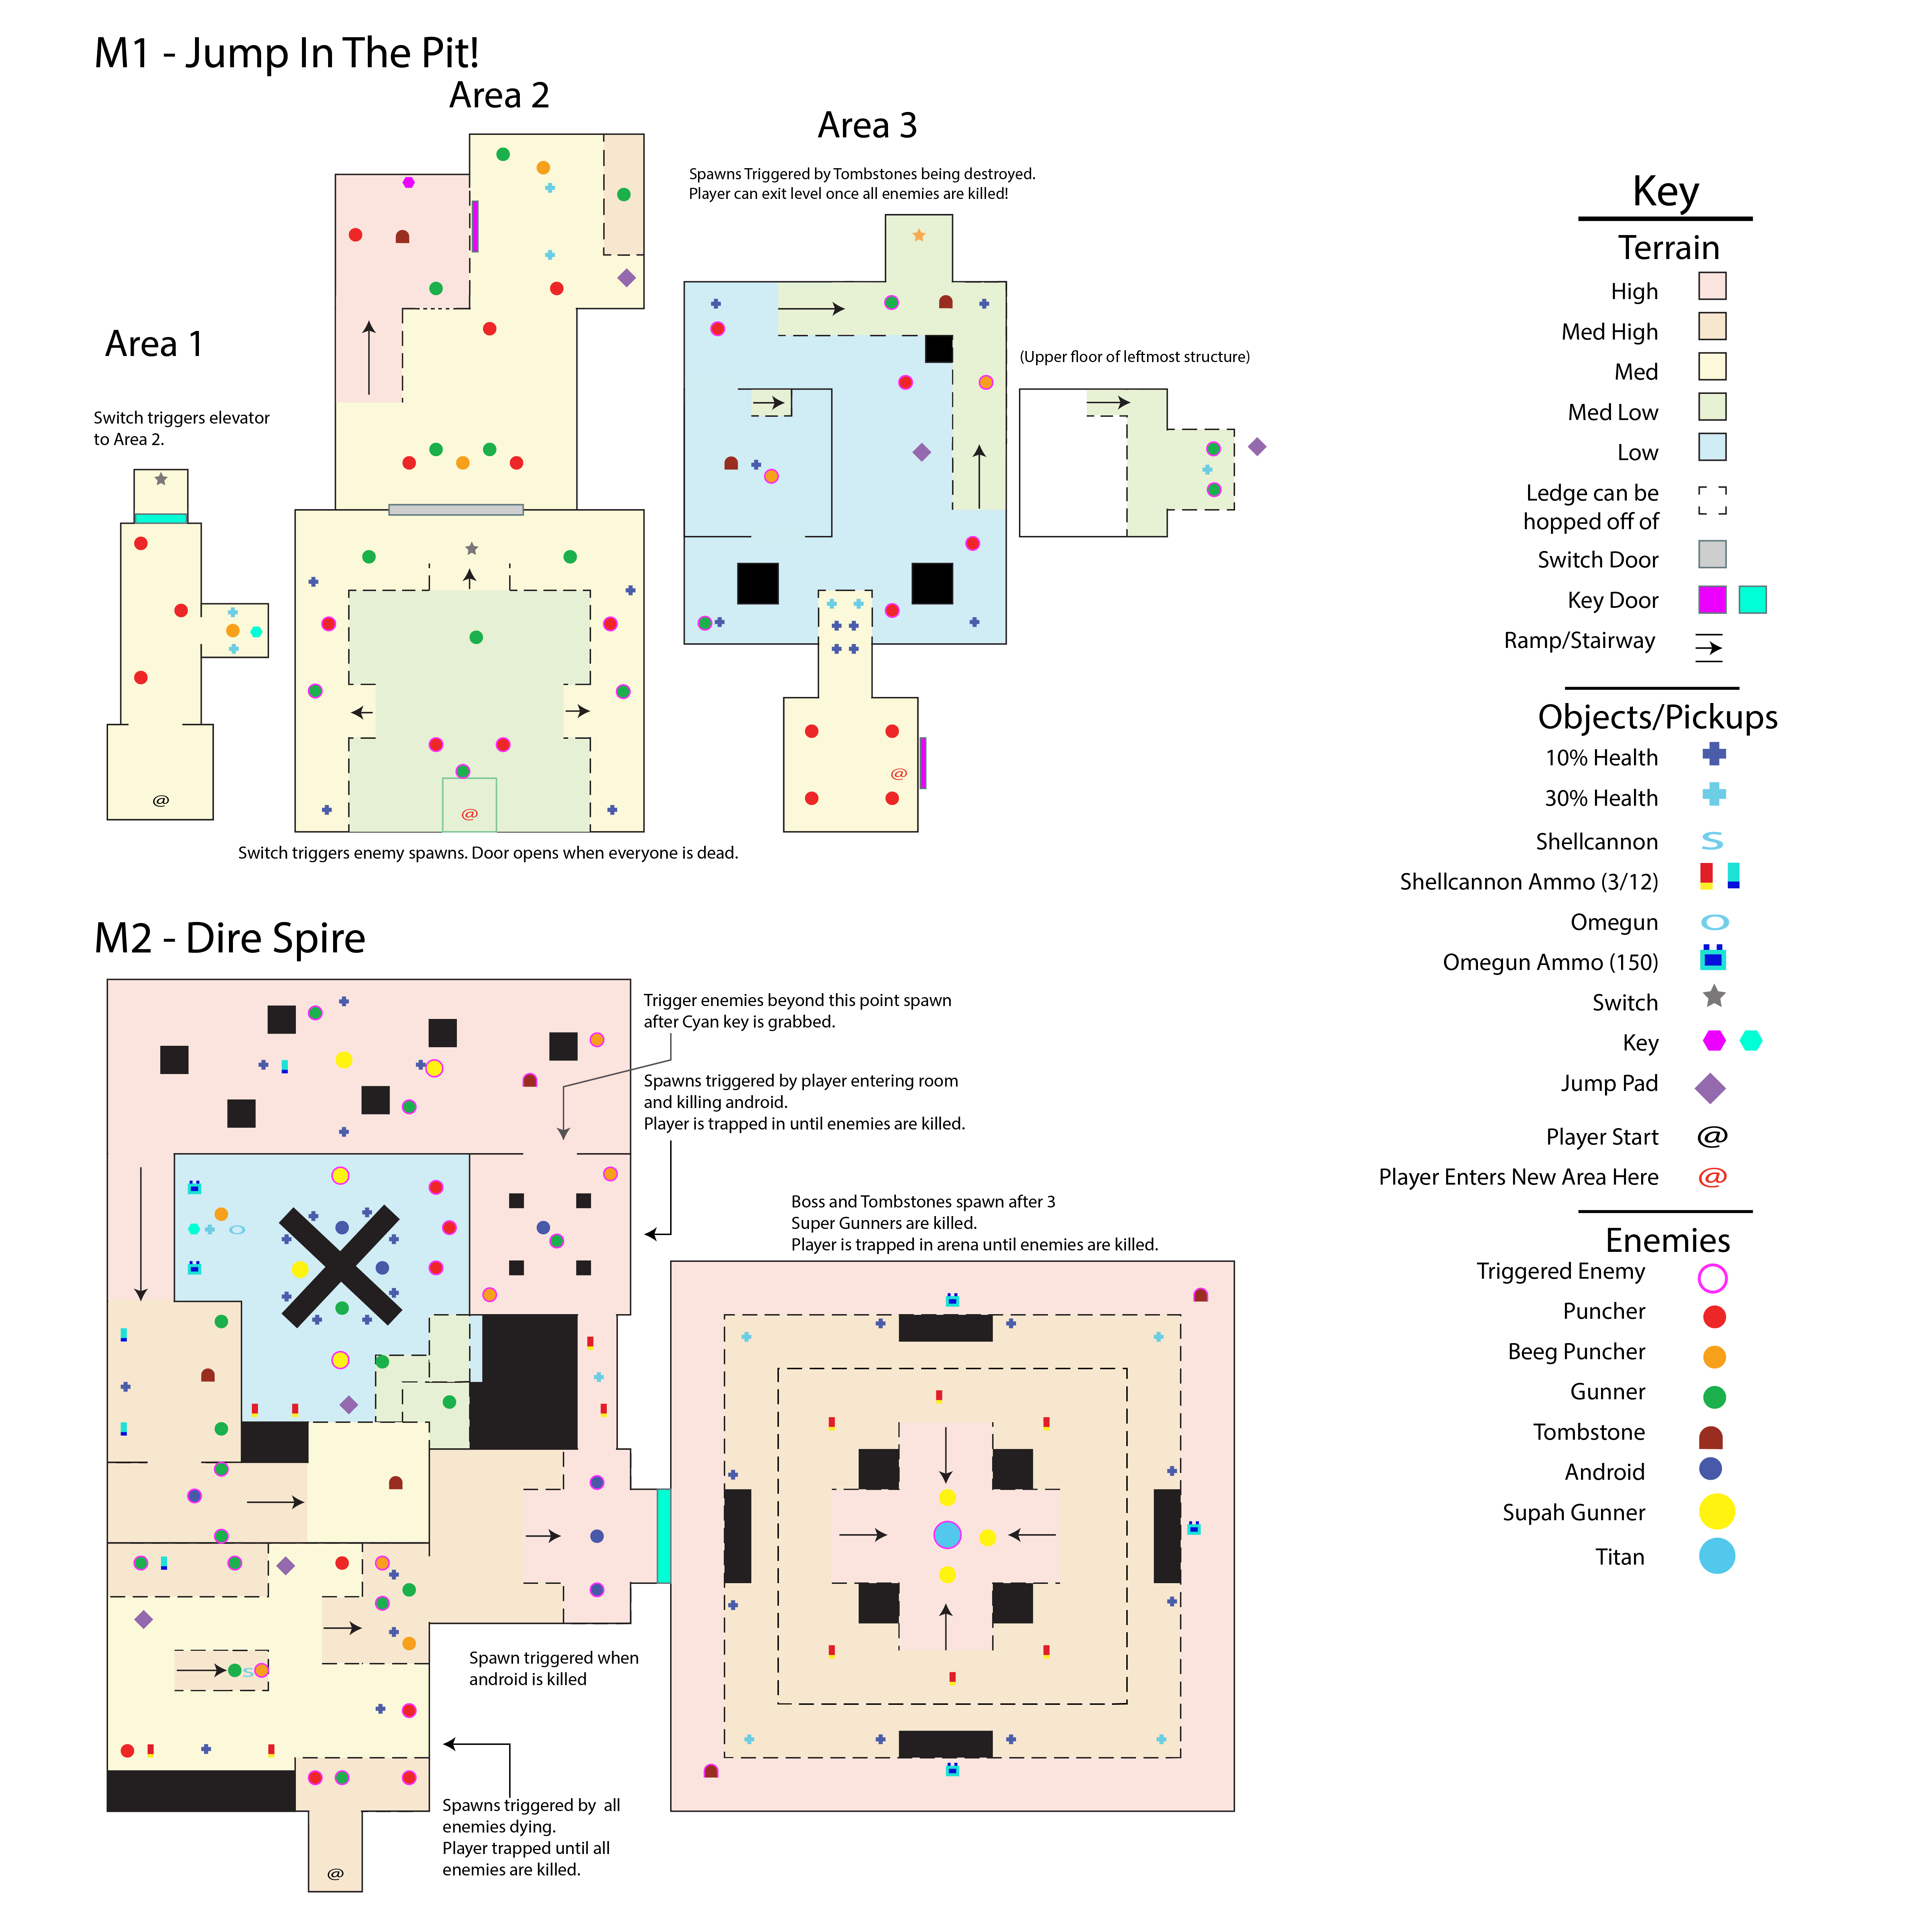
Map 1: The Pit
A short level meant to show off the game's core mechanics. The combat design here is made to give the player a chance to get used to the movement based gameplay, though I also throw in a few surprises to keep things interesting. My level design philosophy in general is to try and show the player something new in each encounter, be it a new enemy, combination of enemies, weapon, or style of arena.
Starting Area
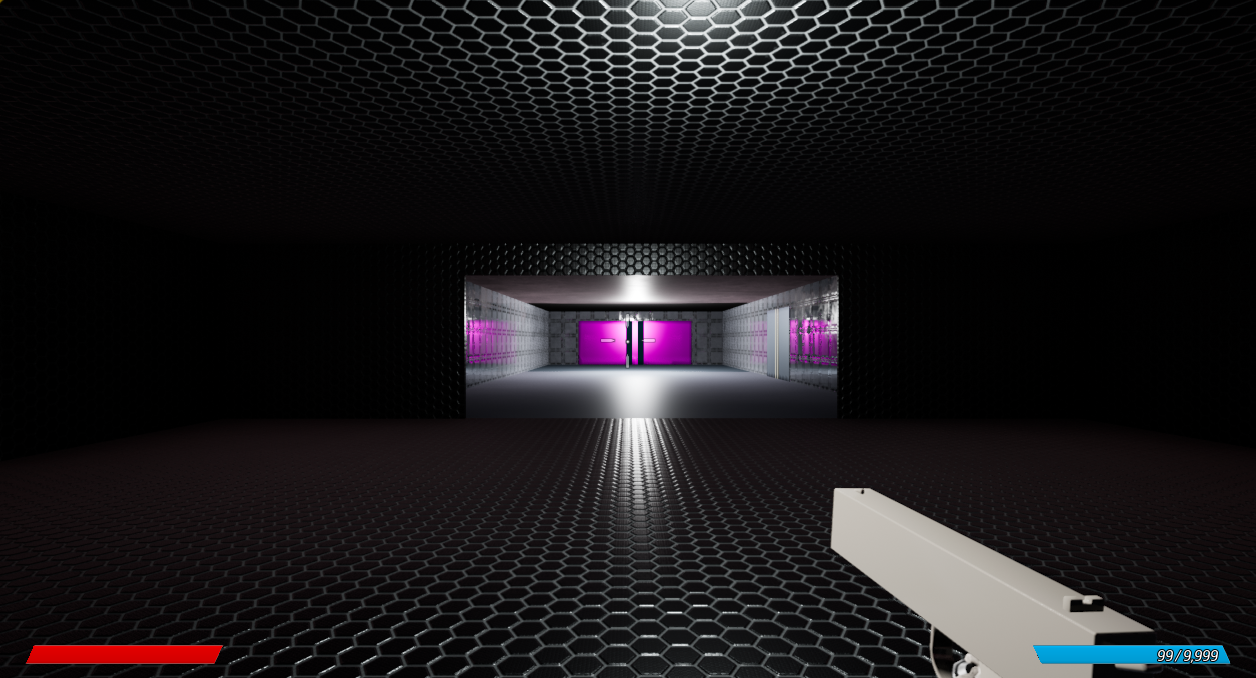
The purpose of this area is to give the player space to figure out their first weapon, so combat is kept to simple melee enemies (henceforth known as "reds"). If the player is pushed back out of the hallway, they should have enough space in the starting room to maneuver around the enemies without getting hit. Reds are quite short ranged, but have a very fast attack animation; If the player gets too close for even a brief moment, they will almost certain be hit with an attack. This makes them quite effective at blocking the player's movement in later encounters.
The orange melee also receives a surprise introduction, spawning suddenly in front of the player when the purple key room is opened. Having a bit of a surprise every now and then helps keep the level memorable, though this also gives a quick introduction to the game's second melee enemy so that the player is not overwhelmed when it appears later.
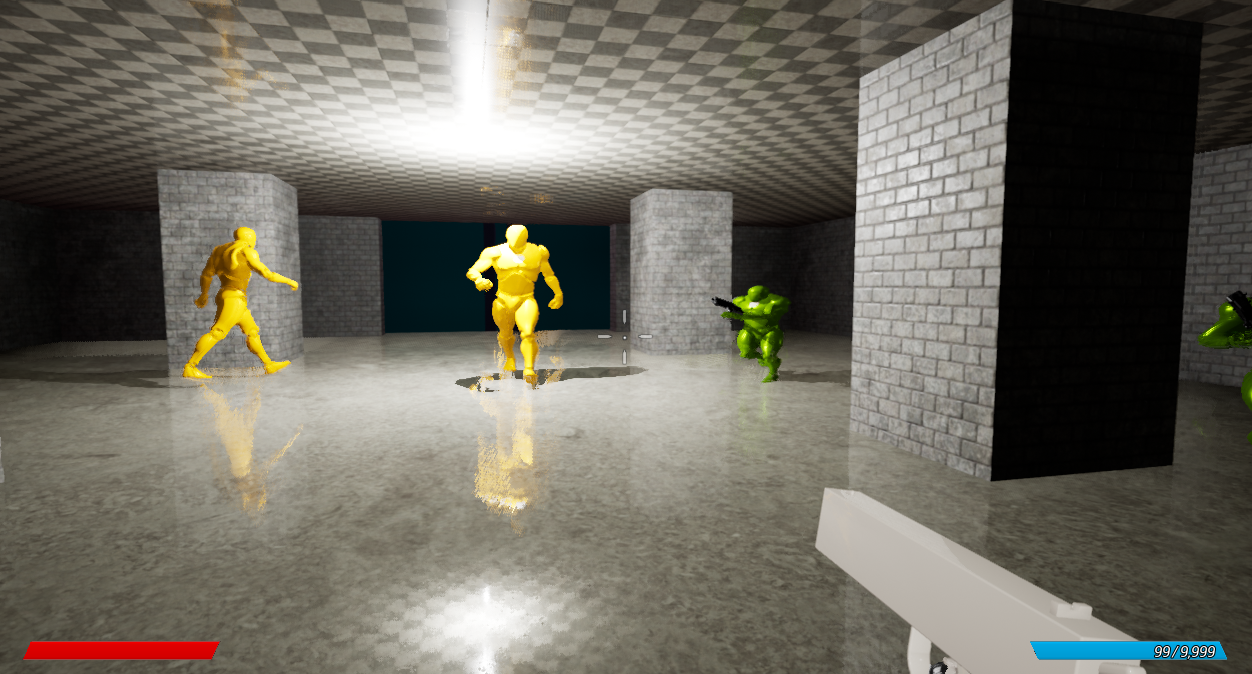
Green Soldier Room
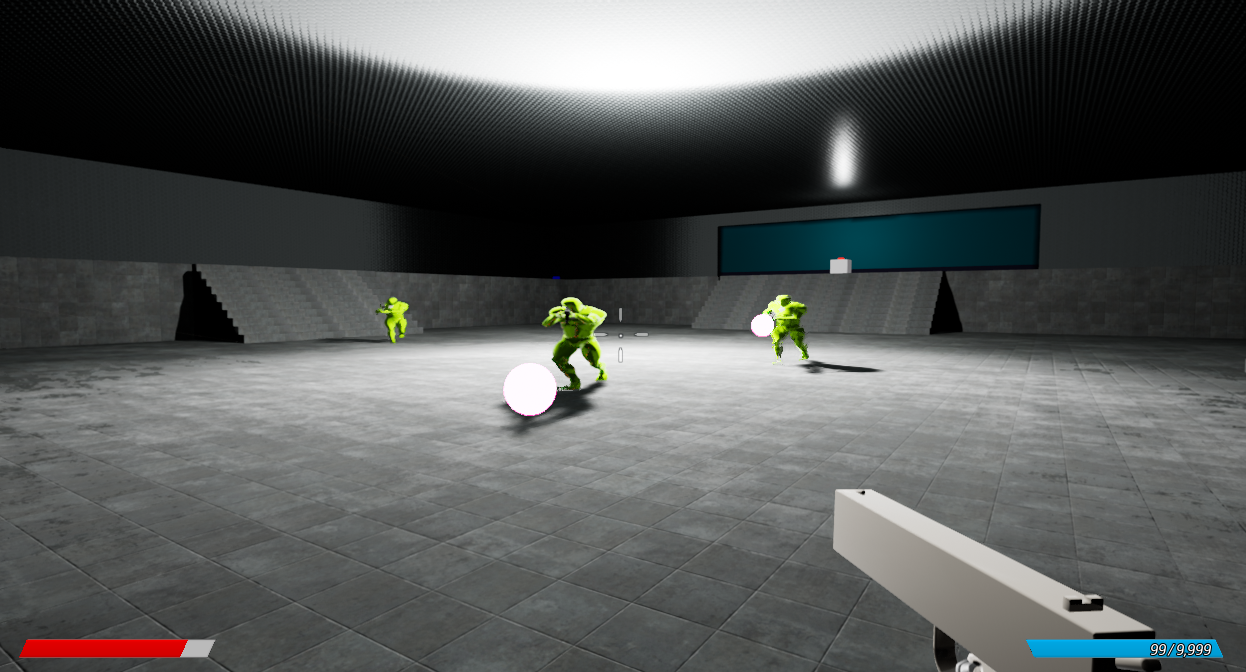
The player meets their first ranged enemy in this room, henceforth known as greens. In my own personal experience with shooters such as DOOM Eternal, one of my first instincts starting out in the game would be to hide and take cover from enemies. The template's AI was not nearly good enough to punish the player for doing this, so to hammer home that the player can avoid projectiles just by dodging, there's no cover in the arena!
The button that looks like it should open the exit is a fakout and instead triggers the next phase of the arena. A light cuts out when the button is pressed to give the player a "something's wrong" feeling. I tried to time the spawners so that they would start spawning around the time the player would look back behind them to see if they missed anything.
The second phase of the arena is the first truly chaotic combat the player is placed in, combining both the red melee enemies and green ranged enemies. I try and build combat that pushes the player *just* enough that completing the encounter makes them feel cool and like they are getting better at the game. I expect less experienced players to get nicked once or twice by the enemies as they learn situational awareness. However, they will also quickly realize, if they have not before, just how easily they can mow down a squad of enemies.
The Courtyard

As soon as the previous arena's enemies have been dealt with, the player is given a checkpoint and introduced to yet another mob of enemies. Most enemies in OMEGUN are fairly harmless individually, but often make up for this with sheer numbers. This encounter, however, gives the player an advantage they did not have before: Positioning! All the enemies spawn in front of the player, letting them push through the hoard without worrying if someone is behind them. There is even a line of health pickups enticing the player to move forward into the area, with some larger pickups in the back for when the player either clears the area or feels confident enough to dance with the remaining swarm.
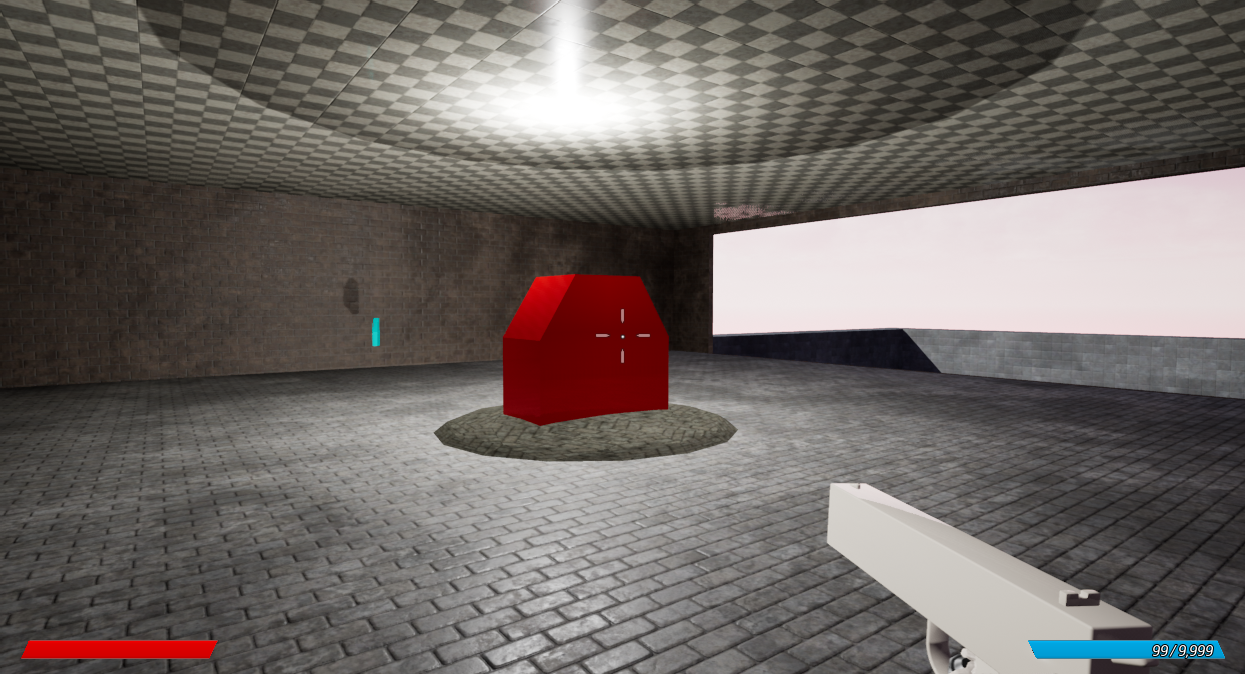
A new enemy, the tombstone, is introduced in this encounter, lazily spawning reds until it is destroyed. More enemies spawning during a chaotic fight such as this without the player being able to easily see that this is happening might normally make for a painful encounter, except the enemies are neither strong nor well positioned enough to take advantage of this. The tombstone's spawn rate is also too slow for it to be much trouble if ignored on accident. Its placement in this encounter is more of an introduction than anything, though one that serves to catch the player off guard mid battle without turning the fight much in the enemy's favor.
Cyan Door Ambush
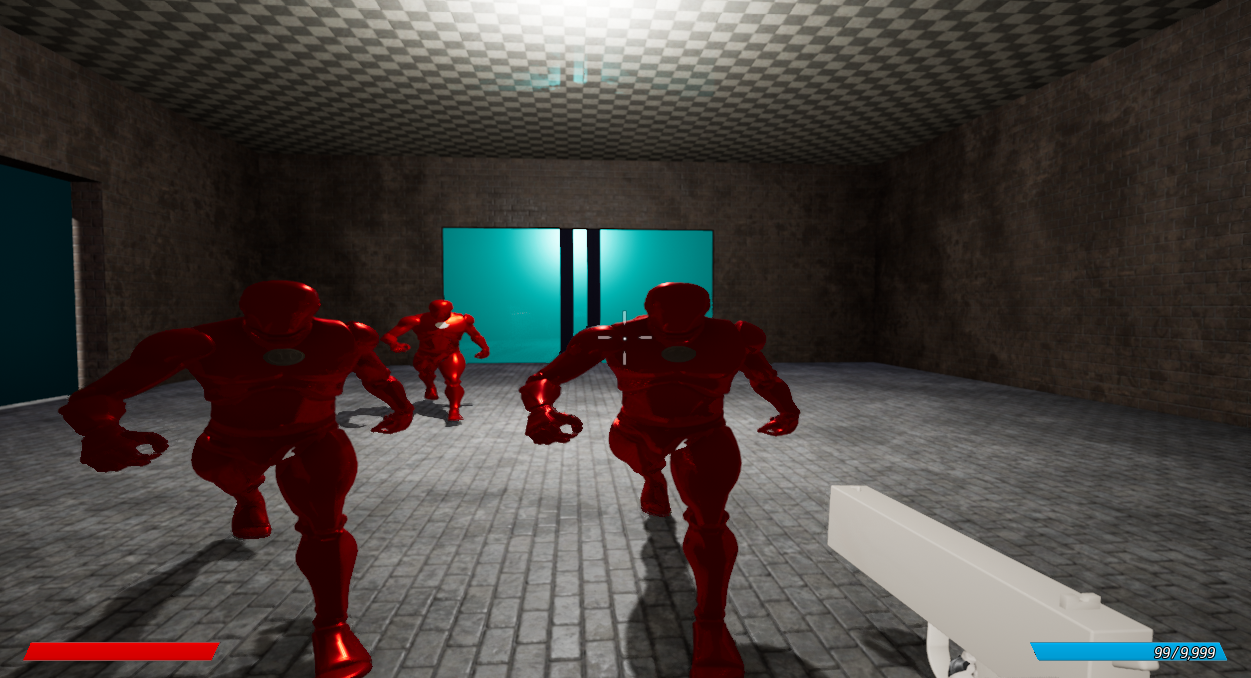
Once the player has acquired the cyan key from the previous area, they may reach the level's finale, except, there is a trap! When the player walks into the cyan door's room, they are locked in with four reds, who can easily corner and beat the player to death if not either killed quickly or evaded deftly.
Having been some time since making this encounter, I probably would have removed an enemy or two, or perhaps placed a health pickup in the center. In fact, I would consider removing the encounter altogether to give the player a bit of a breather before the finale. As it is, however, I think it is a great chance for the player to show off their reflexes and aim. The player also gets a checkpoint so that they don't have to do the courtyard fight over, and just in case, I made sure the encounter could be beaten without taking damage (In general, I'm cautious about adding any form of "health taxing" to games or levels I design).
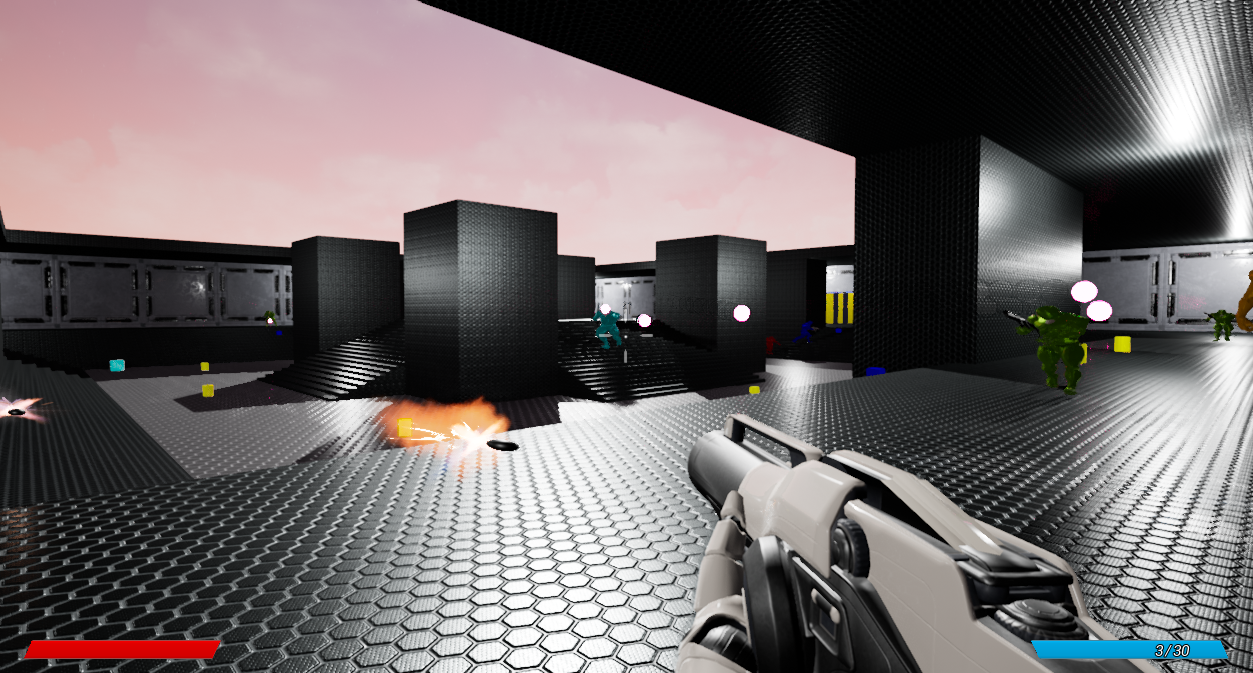
Finale Encounter
Before this room, I do two things to prepare the player: First, they receive enough health pickups to easily put them at max health. Second, the player is given a high vantage point of the arena before they (literally) jump into it. The vantage point also adds a sense of foreboding to the area.
The first phase of this encounter, 3 red spawning tombstones, is a warm up that lets the player get the lay of the land. The second phase fills the arena with a mix of reds and greens with an orange thrown in, similar to the courtyard but without the advantageous starting position: The player will need to be constantly moving and constantly aware of their surroundings to avoid damage from the many enemies. To help the player, the arena has plenty of spots where they can break line of sight with ranged enemies and plenty of room to escape the melees, giving them opportunities to pick off enemies with the pistol's mighty secondary fire.
Map 2: Dire Spire
This level heavily ramps up the gameplay, adding a couple extra dangerous enemies and ending in a boss fight against one giant foe. The player's arsenal also ramps up to match, giving them a heavily increased damage output if they can manage the ammo of their two new weapons. I wanted this level to try and get the most out of the new weapons and altered enemies of the template. You'll find this map to be quite dense with action, every encounter either challenging the player to introducing something new to the gameplay.
Starting Room
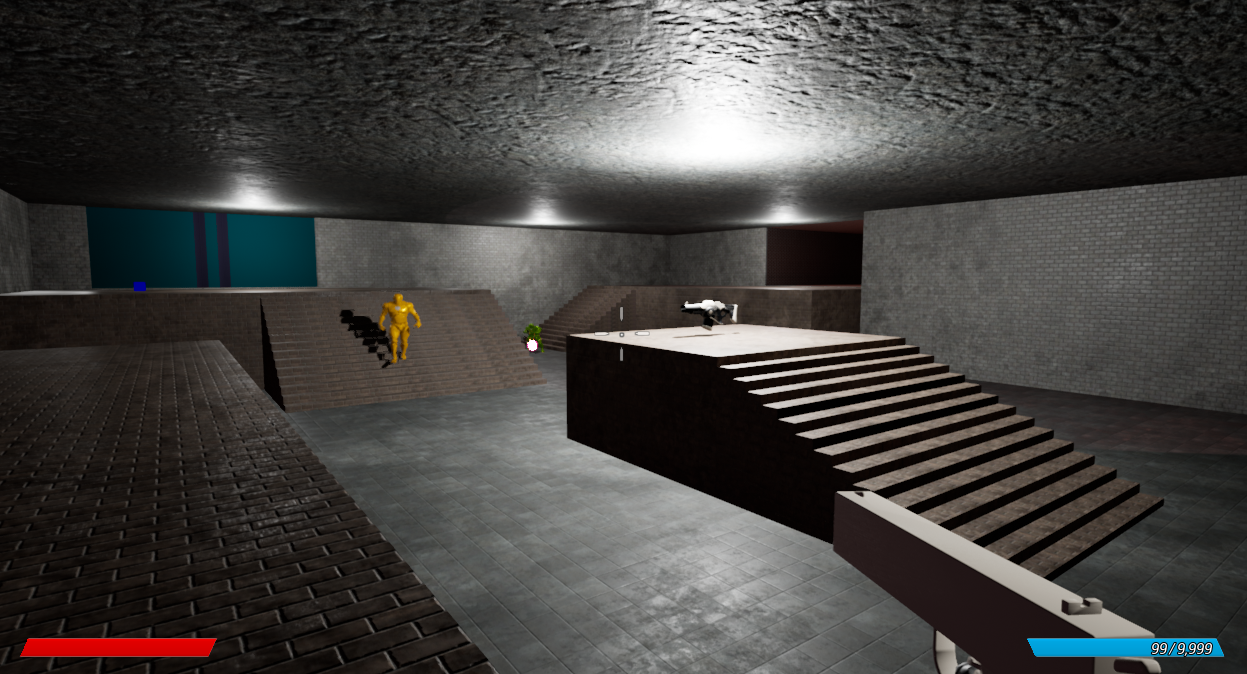
This room has one purpose, and that is to introduce the game's shotgun: The Shellcannon. The room is tight, and the ledges only offer a brief reprieve before melee enemies find their way up them (they can use the jump pads to reach the stairless ledge!). Any enemy that isn't already close enough to be one-shotted by the Shellcannon can quickly be closed in on. The player must be wise with how they traverse the arena, as not only must they avoid enemies, but they must also collect the Shellcannon's ammo since the gun does not start with much ammo when picked up.
The first phase of the arena spawns a modest assortment of melee and ranged enemies; Not so much that the player would feel uncomfortable using just the Spitfire against them. The second phase, on the other hand, is absolutely dense with enemies. Luckily, the Shellcannon makes it easy to thin their numbers. The limited space the player can travel in any one direction means enemies often become bunched together as the player is forced to circle or hop over them, consequently giving them the chance to use the Shellcannon's rocket spewing secondary fire. To ensure the second phase does not start before the player is prepared, it will not trigger until the player picks up the Shellcannon, even if all of the first phase enemies are dead.
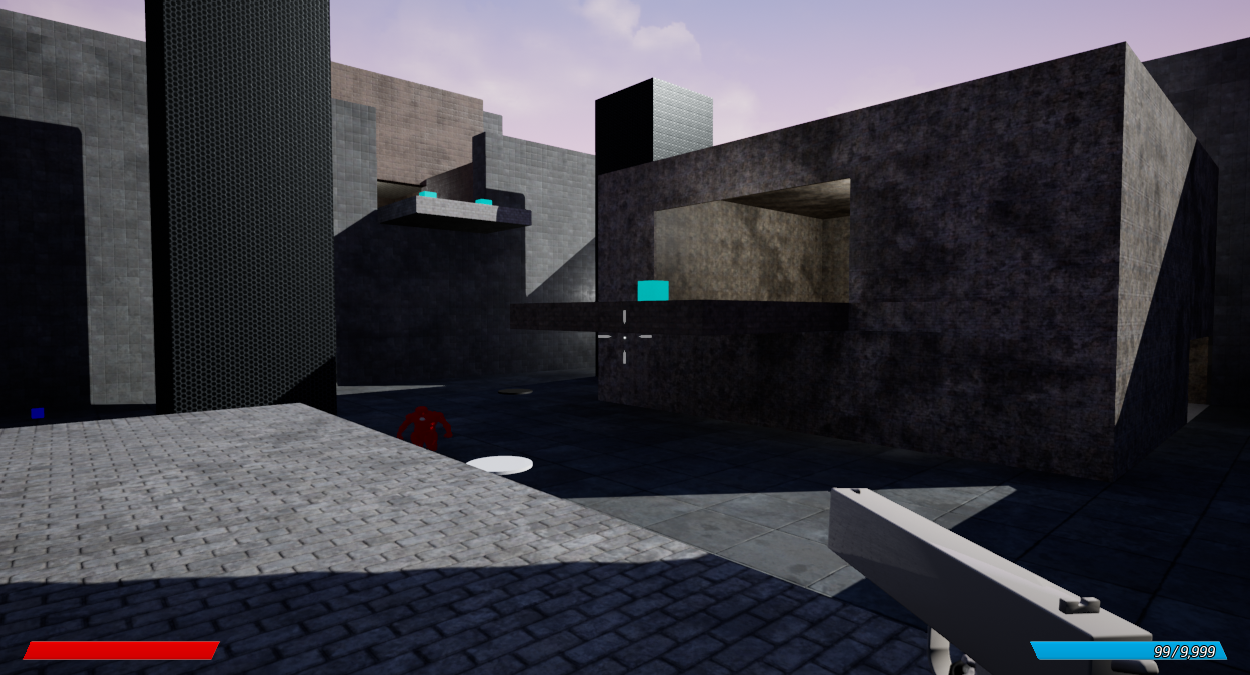
The arena is spaced particularly so that the player can jump between the raised platforms. In my opinion, this arena is the most fun to both fight and traverse through. The platforms, spread out ranged enemies, and mob of melees threatening to overrun the player means that they are constantly maneuvering for a new favorable position, and this arena offers plenty of interesting ways to maneuver.
Machine Gunner Room
The next room introduces a new kind of ranged enemy: A machine gunner (henceforth known as gunners) whose rapid stream of projectiles can easily interfere with the player's movement and chip away at their health. Cover becomes much more crucial when this enemy is in play: even though the projectiles can easily be strafed, the player will almost certainly be hit by the stream if they change directions.
Of course, the player can also just kill them quickly. The room's cover lets the player easily get close enough to kill the gunners with the newly acquired Shellcannon.
Trap Room - Take Two!
Once the initial gunner is killed, the player is locked inside a cramped space with two greens and a pair of oranges. If the player hated Map 1's version of this trap, they can easily get revenge with their, you guessed it, Shellcannon. The greens cannot restrict the player's movement nearly as well as either type of melee enemy, so despite the pillars and bigger foes, the room is more traversable than Map 1's trap room, even without the Shellcannon. The variety of enemies also allow for a higher variation of strategies: A player might quickly take out the greens with the Shellcannon and save ammo by using Spitfire's secondary now that their are no ranged enemies to punish its use from afar. Another player may decide its safer to kill the oranges first so that they can move about freely, saving the less oppressive greens for last.
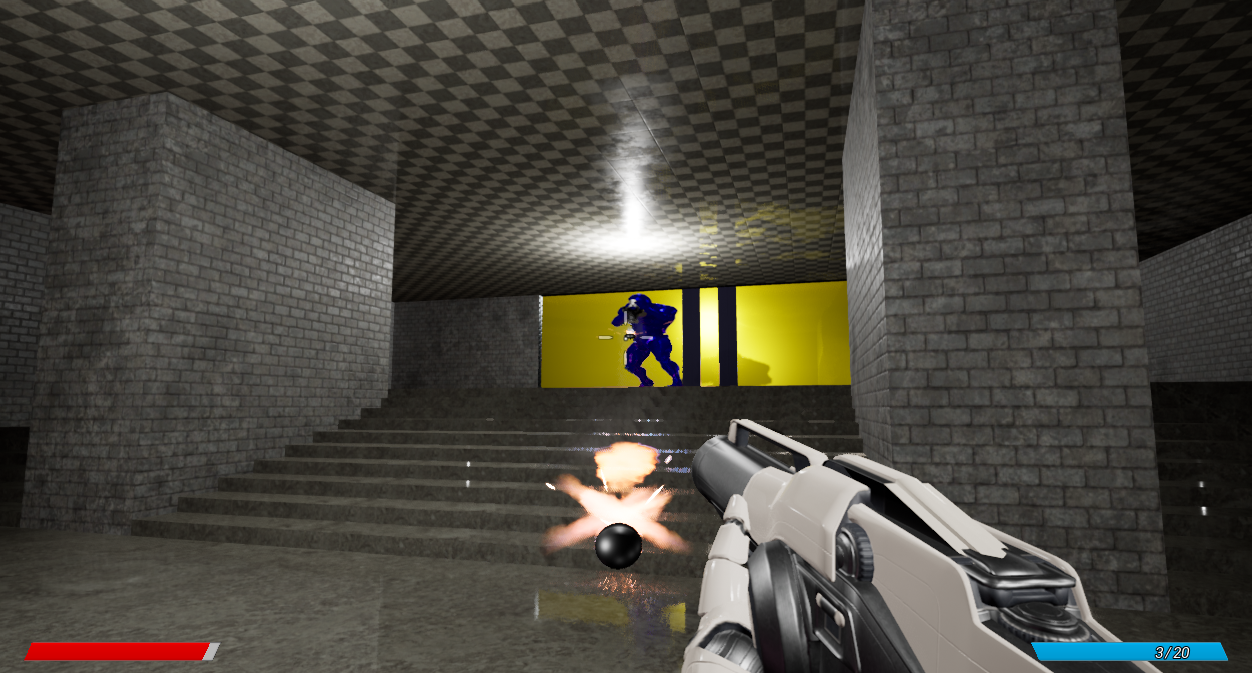
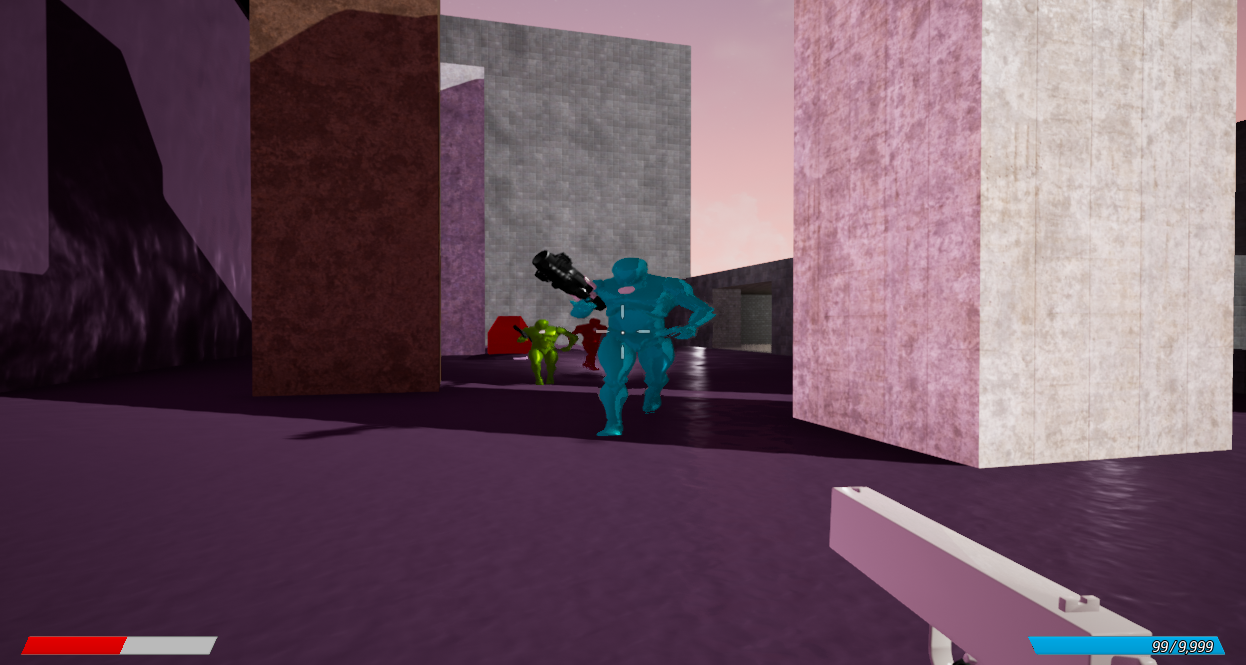
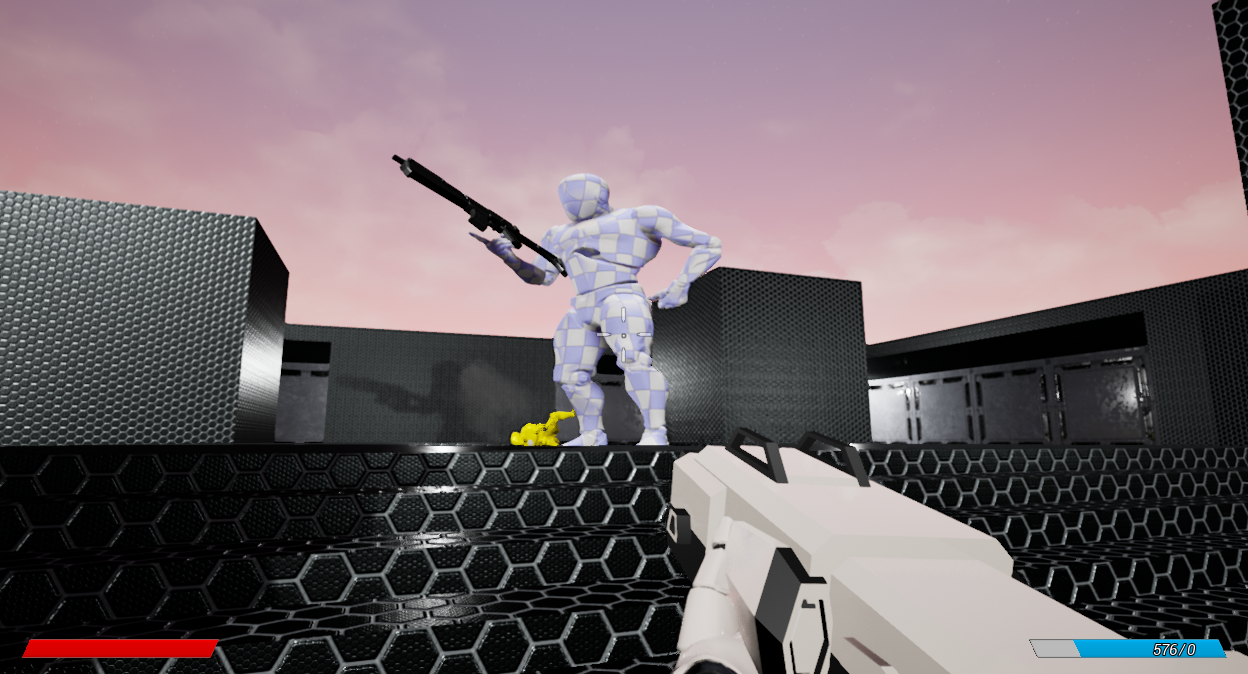
Super Soldier Introduction
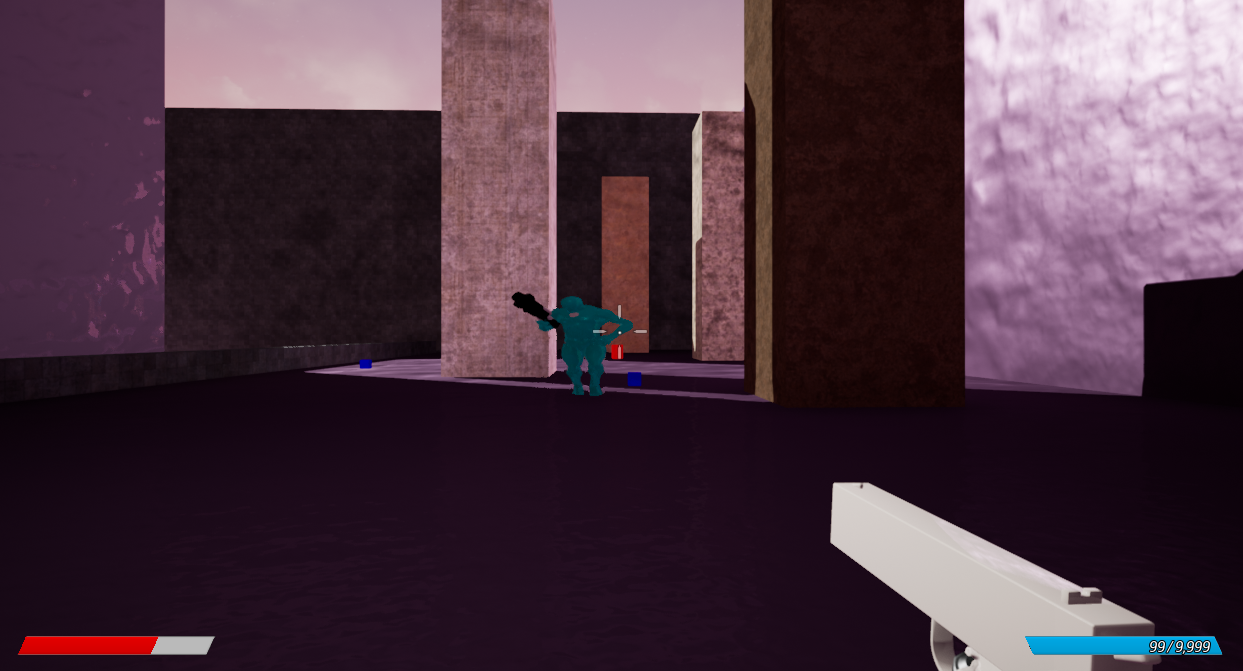
My favorite enemy in the game gets introduced in this room: The Super Soldier. This enemy does it all. It's fast, has a large health pool, and has dangerous attacks to match. Its attacks randomly change between a 5-shot burst of slow projectiles or a 2-shot burst of the same projectiles but in a three-way spread. The three-way spread can easily catch a strafing player if they aren't watching for it, while the burst fire can punish the player for slowing themselves down with their weapons' secondary fires. Watching the S-Soldier to keep track of its attacks or avoiding line of sight when you can't is vital to preventing damage.
Luckily, the S-Soldier's large size makes it more susceptible to the Shellcannon's massive spread. The player may also keep their distance and spam bursts of rockets. With practice, the player can quickly dispatch an S-Soldier with the Shellcannon while taking little if any damage. This is the first enemy, however, where the pistol becomes a liability due to the danger of its secondary fire and low damage of its primary. The risk of a tough enemy such as this coming into play makes ammo management all the more important.
The first S-Soldier arena is long with many pillars to hide behind should the player need to pass by him, which is likely to become necessary with the threat of being cornered by its aggressive AI. Near where the enemy spawns in a large shotgun ammo pickup, which the player will surely need either during or after the fight. The health pickups on the ground are all small pickups, so if the player takes damage, their movement skills may be put to the test as they attempt to restore their health while dodging the S-Soldier's many projectiles.
After killing their first S-Soldier, the player must face down a hoard of reds and greens and destroy the Tombstone's responsible for spawning them. A great deal of Shellcannon ammo is found early in this part of the encounter, so the player will have access to rockets to clear away the crowd. The next checkpoint will not activate until the player clears all of the enemies, so while they can try and skip the encounter, they will have to repeat it if they die in the next one!
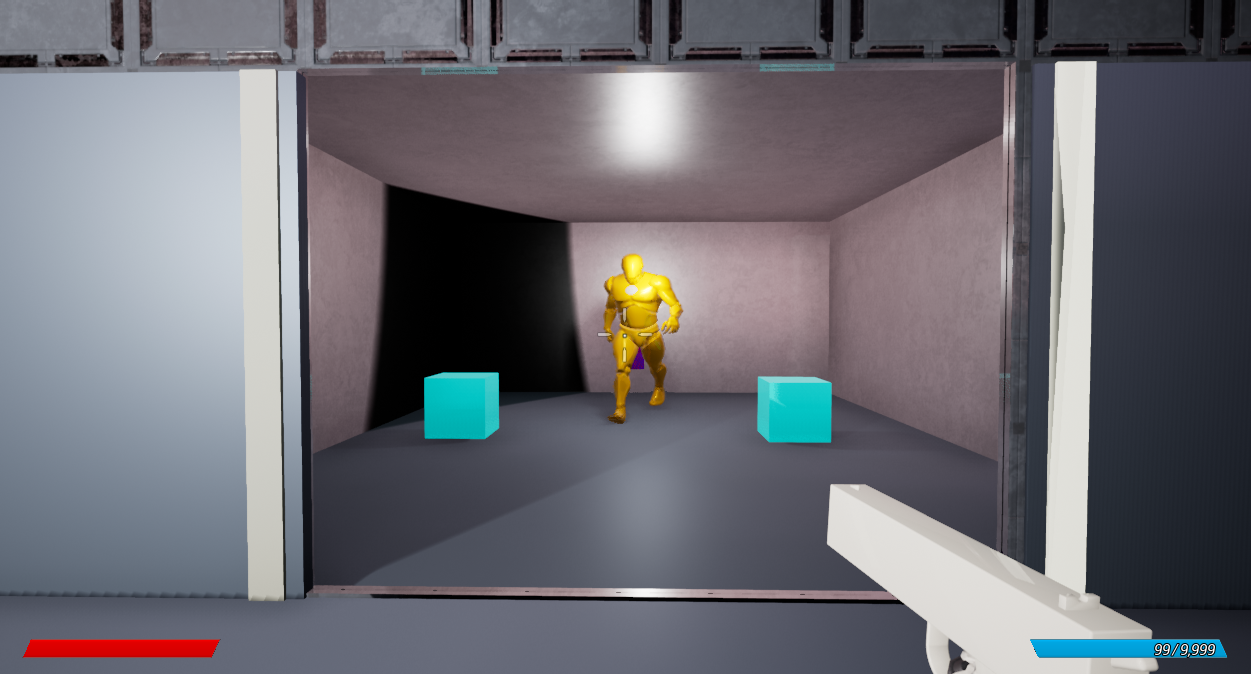
Yellow Key Room
After a brief encounter with gunners and some supporting enemies, the player is introduced to their ultimate weapon: The OMEGUN. I want the player to understand just how powerful of a weapon they have picked up. Once the yellow key is grabbed, two S-Soldiers, supported by a trio of reds, will spawn. The tight space makes it easy to be put in an unfavorable position, except the OMEGUN can kill these enemies so fast that it matters little.
When obtaining a powerful resource, there will always be the temptation to hold on to it in case of a tougher encounter, even as a present encounter is giving the player trouble. However, powerful resources feel great to use, especially if used strategically, so I always try to make encounters that get the player to use at least some of the resources they are given.
Backtrack to Yellow Door
On the way to the main encounter, there is a small encounter with two greens and a gunner. It would be a (slight) waste of ammo to use the OMEGUN on these enemies just to behold the weapon's insane kill speed on them. The option is there, though.
The main event is a S-Soldier, a few greens hiding behind the pillars, an orange, and a tombstone which cheekily spawns reds in the back of the arena. The player's attention will constantly be split between avoiding the fodder, dodging the S-Soldier attacks, and perhaps killing the tombstone so that reds do not clog the area, which can happen surprisingly fast with this spawner. The S-Soldier's speed and many projectiles can easily restrain the player's movement or force them into bad positions; Similar to the previous encounter, withholding the use of the OMEGUN means dancing with this foe for considerably longer. Unlike the previous encounter, it is the fodder and not the terrain or a second S-Soldier that is making the S-Soldier harder to evade, so a player may conserve ammo safely by rapidly cutting down the weaker enemies with the Shellcannon while using the pillars to hide from the S-Soldier. They may even be able to snipe the tombstone with a round of rockets.
While this was not intentional, the spire in the center of the area combined with the lowering height as the player travels further in means that backtracking to snipe the main encounter's enemies from a distance is impossible. Sudden insights such as this is the very reason this document exists!
The Finale
Beyond the yellow door is the finale to not only the map, but this project as a whole. Ammo and pickups are scattered throughout the room to give the player plenty of resources, though not quite so much that the player can mindlessly abuse their weapons. If the player wants to keep their Shellcannon from running dry, they'll need to move throughout the arena to gather ammo. As soon as the player descends the stairs into the middle part of the arena, the encounter begins. They must defeat the first wave and the boss with no checkpoint in between. Though this sounds brutal, this is actually in case the player uses up all their ammo or health before the boss fight or otherwise wants a chance to save or gather more resources should they die.
Originally, the battle had three S-Soldiers, but I find that having multiple of the same enemy doesn't always change the way the player fights them: Though intimidating, sidestepping ten projectiles is just as difficult as sidestepping five. The encounter neither gave the player anything new nor did it test the player's skills as much as the strong enemy type might have suggested.
Currently, the first wave is two S-Soldiers, two gunners, four greens, two oranges, and just for fun, a single red. The increased number of enemies take great advantage of the arena's large size. The gunners, though easy to kill, can easily chip away at the player's health, even potentially from a distance. The S-Soldiers are more persistent, but their attacks, including the spread attack, are easy to avoid if the player is far away. The player may also kill one or both quickly with the OMEGUN, whose guided secondary shines in the arena's long distances, which allow the player to dodge projectiles in spite of the reduced speed from secondary use. The rest of the enemies are mere fodder which can safely be dispatched at the player's leisure. The player will need good movement, target priority, and situational awareness to make it through this combat. The sheer number of projectiles flying throughout the arena, though not as troublesome as it may appear, give the fight the spectacle a finale deserves.
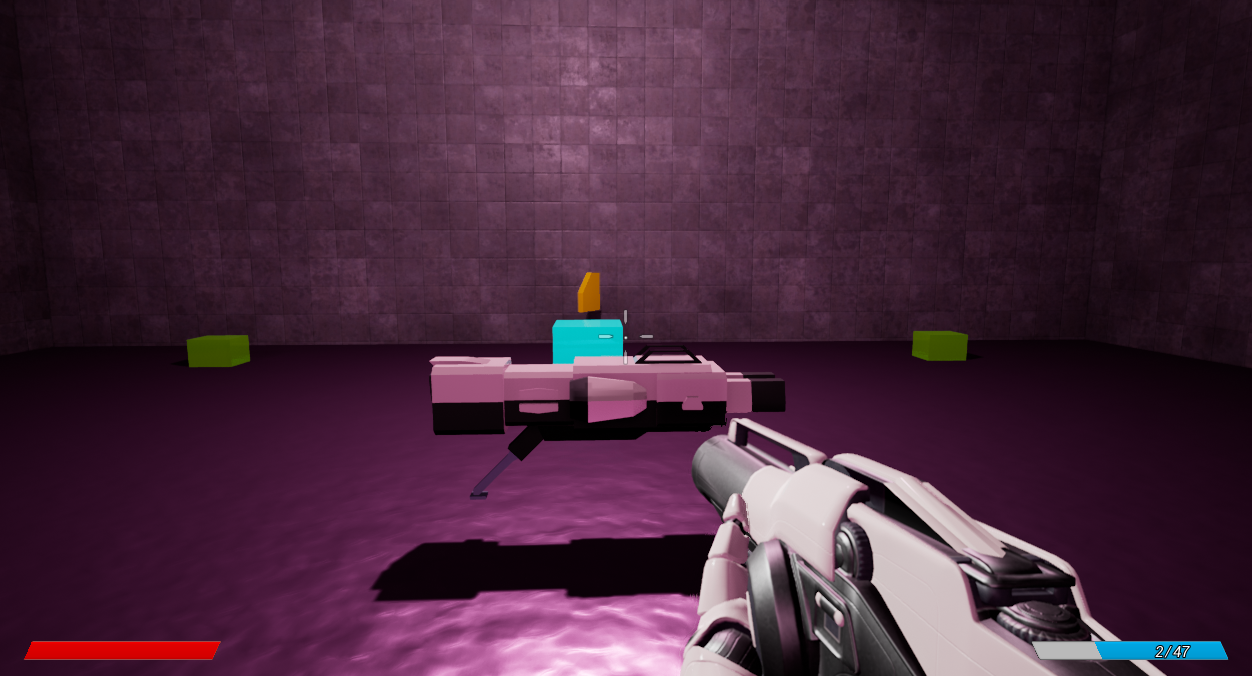
Once the wave is cleared of enemies, the boss spawns. The Boss is a massive enemy who attacks by spawning a trio of bomber's who sprint at the player before exploding. This attack is on a very long cooldown, during which the player must kill the bombers and attack the boss. The bombers themselves are extremely fast, able to accelerate to a speed faster than the player, but cannot turn very easily and must regain their momentum after doing so. They do a considerable amount of damage (20% health each), so ignoring them is very dangerous, though they aren't hard at all to kill. To up the ante, a pair of tombstones appear 15 seconds into the fight, spawning greens to harass the player.
Contrasting from the last wave, this fight focuses on a singular dangerous foe. The best time to take out the bombers is when they first spawn. Once they have begun charging at the player, their high speed makes them both more difficult to avoid and harder to hit. Such is exactly why I tempt the player to take their attention away from the boss with tombstones part way into the fight, not to mention the possibility of having to search for pickups if the player is in need of health or ammo. In a concise way, the boss forces the player to demonstrate one last time the game's skills of target priority, movement, and ammo management. Though likely to be tense on a player's first time through, the fight has a satisfying way of becoming trivial once the player gets the hang of it, which always makes a boss feel empowering.